Recently, we released our official Shipyard GitHub Action, and we wanted to share our findings and experiences from creating our first GitHub Action. In this post, you’ll learn how to write a simple GitHub Action in Python.
Brief Overview of GitHub Actions
In 2019, GitHub released its own CI tool called GitHub Actions. According to GitHub, Actions make it easy for developers to automate tasks within the software development life cycle (SDLC). The native ecosystem integration enables projects to be automated from the moment developers commit code for deployment into production.
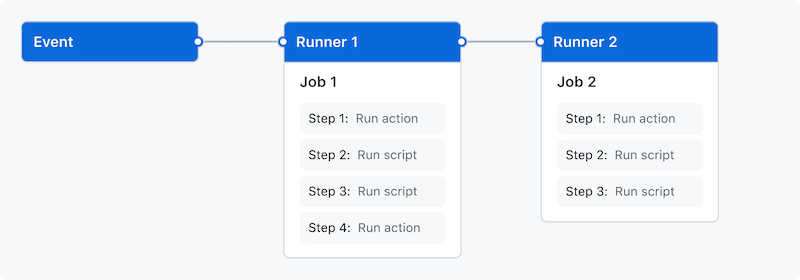
Before looking at a sample GitHub Action, we’ll familiarize ourselves with the syntax and terminology that we’ll encounter:
-
Workflow: A configurable automated process that will run one or more jobs. Workflows are defined by a YAML file within your repo and will run when triggered by an event in your repo. They can also be triggered manually, or with a defined schedule. Workflows are defined in the
.github/workflowsdirectory in a repo, and we can have multiple workflows per repo, each of which can perform a different set of tasks. -
Event: An activity that triggers a workflow; these can be based on events such as push or pull requests, but they can also be scheduled using the crontab syntax.
-
Job: A task in a single workflow. A workflow may consist of one or more jobs, and all jobs need to execute without any errors in order for a workflow to be successful.
-
Step: A smaller task that is executed within a job. All steps must be completed in order to complete a job.
-
Action: A standalone command performed in a step. You can write your own Actions, or you can find Actions to use in your workflows in the GitHub Marketplace.
-
Runner: A server that runs your workflows when they’re triggered. Each runner can run a single job at a time. GitHub provides Ubuntu Linux, Microsoft Windows, and macOS runners for workflows; each workflow run executes in a fresh, newly-provisioned virtual machine.
Writing your Python GitHub Action
Now that we’ve covered the basics, let’s start writing our first Python Action. If you don’t already have a repo, create a new public repo on GitHub. You cannot create and distribute your GitHub Action from a private repo.
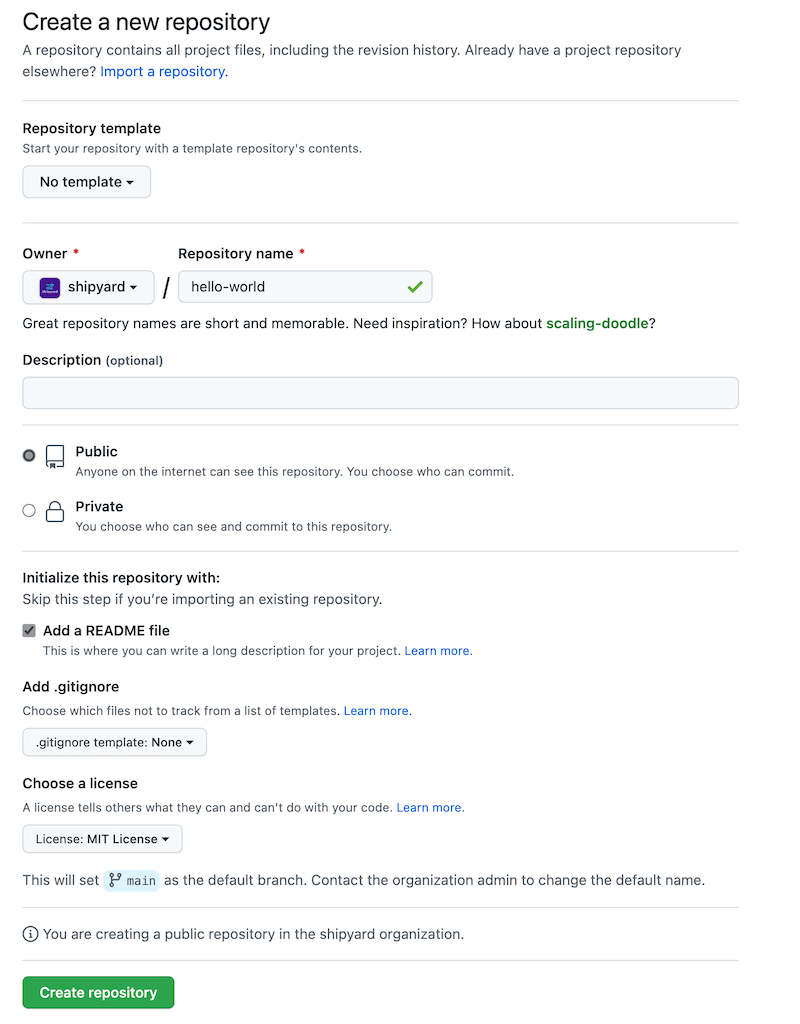
Once you’ve created the repository, clone it locally and open it on your favorite IDE.
git clone https://github.com/shipyard/github-action-python-template.git && \\
cd github-action-python-template && \\
code .
First, we need to add the most important file for any GitHub Action, namely, action.yml. This file serves as an interface for our Action and defines its inputs, outputs, and the run commands. It uses YAML syntax. You can read more about different components and configurations for action.yml here.
The action.yml always has to include:
-
name: The name of your Action. This must be globally unique if you want to publish your GitHub Action to the Marketplace.
-
description: A short description of what your Action does.
-
inputs: Defines the input parameters you can pass into your bash script. These are injected as environment variables and you can access them with
$INPUT_{Variable} . -
outputs: Defines the output parameters that you can use later in another workflow step.
-
runs: Defines what/where the action will execute.
Now, let’s create a simple GitHub Action, which will take an integer input and return the square as an output. Here is our action.yml file which we will use for our example:
# action.yaml
name: 'Custom GitHub Action'
description: 'A GitHub Action that takes an input and returns the square of the number'
inputs:
  num:
    description: 'Enter a number'
    required: true
    default: "1"
outputs:
  num_squared:
    description: 'Square of the input'
    # need to specify the extra `value` field for `composite` actions
    value: ${{ steps.get-square.outputs.num_squared }}
runs:
  using: 'composite'
  steps:
    - name: Install Python
      uses: actions/setup-python@v5
      with:
        python-version: '3.10'
    - name: Install Dependencies
      run: pip install -r requirements.txt
      shell: bash
    - name: Pass Inputs to Shell
      run: |
       echo "INPUT_NUM=${{ inputs.num }}" >> $GITHUB_ENV
      shell: bash
    - name: Fetch the number's square
      id: get-square
      run: python src/get_num_square.py
      shell: bash
Let’s go over our action.yml file. Let’s focus on the runs section since other sections are quite straightforward.
using: 'composite'
steps:
GitHub provides three options for actions: Docker, Javascript, and Composite. You can read all about the three options and which one best suits your use case here.
Install Python
- name: Install Python
  uses: actions/setup-python@v5
  with:
    python-version: '3.10'
Leverage GitHub Actions Marketplace!
We started with adding a custom shell script to install Python for our Action but quickly realized that we don’t need to reinvent the wheel. GitHub provides several actions that can be used, such as setup-python, which we will use to install Python. You can read more about this Action and different capabilities, such as Matrix testing, versioning, and caching at the official documentation here.
Install Dependencies
- name: Install Dependencies
  run: pip install -r requirements.txt
Even though our example is pretty straightforward and we will not be installing any dependencies, we wanted to include how you would go about installing dependencies. Update the command to the package manager you are using, such as pip, poetry, or pipenv.
Pass Inputs to Shell (only valid for Composite Runners)
- name: Pass Inputs to Shell
  run: |
    echo "INPUT_NUM=${{ inputs.num }}" >> $GITHUB_ENV
This was something that tripped us up when we were creating our GitHub Action. We could not figure out what we were doing wrong and had to dig deep to get to the bottom of this. There is an active issue which prevents the inputs from being injected into the runner for composite runners. As a workaround, we will manually inject the environment variable. You can read about the issue here.
Run the Python Script
- name: Fetch the number's square
  run: python src/get_num_square.py
And lastly, we will run the Python script. Let’s quickly write this Python script and test everything out. Create a new folder src and add a new file get_num_square.py, which just sets the output to the square of the input number.
# src/get_num_square.py
import os

# get the input and convert it to int
num = os.environ.get("INPUT_NUM")
if num:
    try:
        num = int(num)
    except Exception:
        exit('ERROR: the INPUT_NUM provided ("{}") is not an integer'.format(num))
else:
    num = 1

# to set output, print to shell in following syntax
print(f"::set-output name=num_squared::{num ** 2}")
Using The Action
Now that we have all the pieces ready, let’s add a workflow to our repo and add the new Action as a step. Create a new workflow in the .github/workflows directory.
# .github/workflows/test_action.yaml
name: Test Action
on: [push]

jobs:
  get-num-square:
    runs-on: ubuntu-latest
    name: Returns the number square
    steps:
      - name: Checkout
        uses: actions/checkout@v4
      - name: Fetch num squared
        id: get_square
        uses: ./ # Uses an action in the root directory
        # or use a released GitHub Action
        # uses: shipyard/github-action/fetch-shipyard-env@1.0.0
        with:
          num: 11
      - name: Print the square
        run: echo "${{ steps.get_square.outputs.num_squared }}"
Commit the new changes and head over to the Actions tab to view the runners in action.
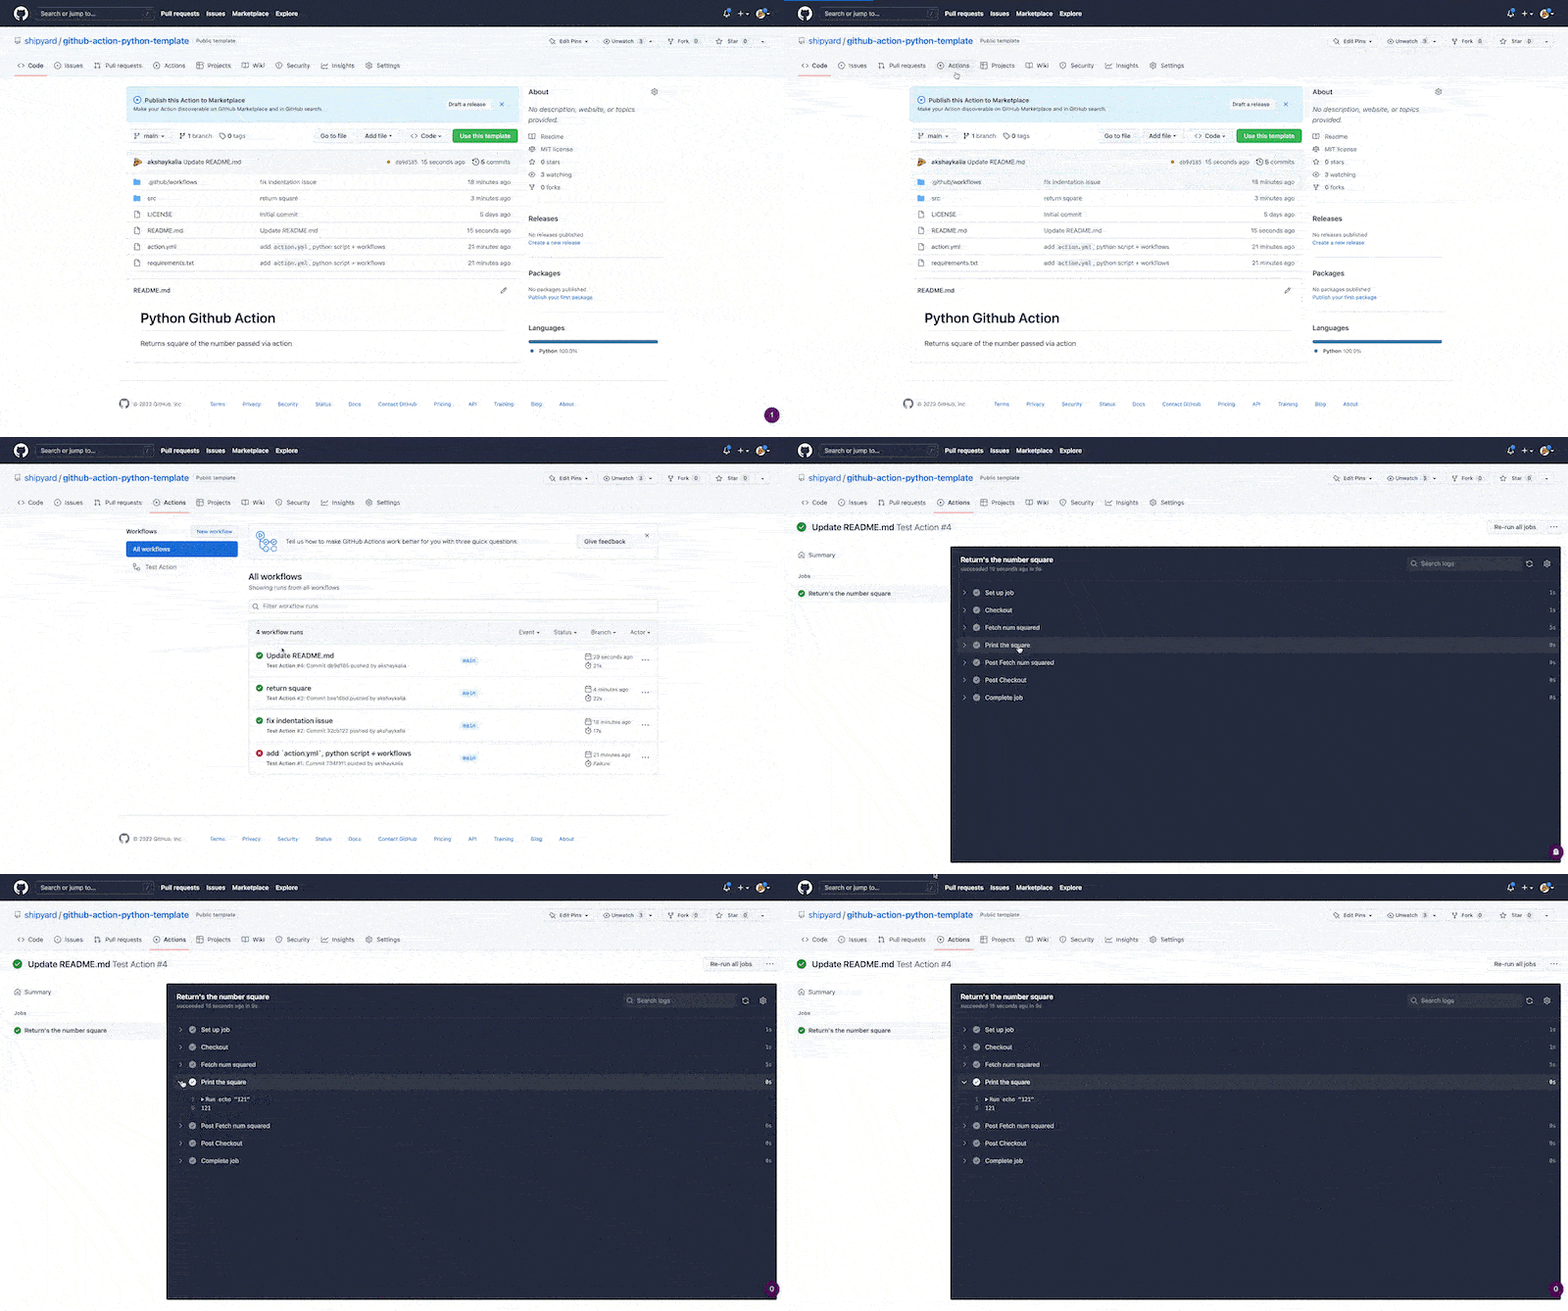
We can verify that our output is correct. We passed 11 as an input argument and can see 121 in the Action’s output.
Releasing a GitHub Action
Once you have verified the GitHub Action, you can release it by clicking on the Draft a release button as shown in the screenshot below.

People can start using this new Action in their workflows all across GitHub once it has been successfully released.
Conclusion
As you can see, GitHub Actions are pretty simple to set up and can empower developers to do amazing things. GitHub Actions has a very strong community of developers with several templates of prebuilt Actions, examples, and workflows so you don’t have to start from scratch. Hope this helps you create some great GitHub Actions. Let us know how the process went and what you ended up creating. Happy coding!
Want to learn how to build and push a Docker image to a container registry using GitHub Actions? Check out our guide!
